Here’s a fun way to completely redo and re-vamp a worn or boring dresser. Give it a brand new look by applying magazine clippings of flowers, beautiful geometric patterns, butterflies, or any other form that catches your eye. This is an easy project that can be done in an afternoon. Here are the steps.
Before You Begin: Gather the Supplies
You will need:
- Dresser with clean surface area
- Foam brush
- Mod Podge
- Polycrylic sealer
- Large paint brush
- Magazine Clippings
- To Get Started
Get Started
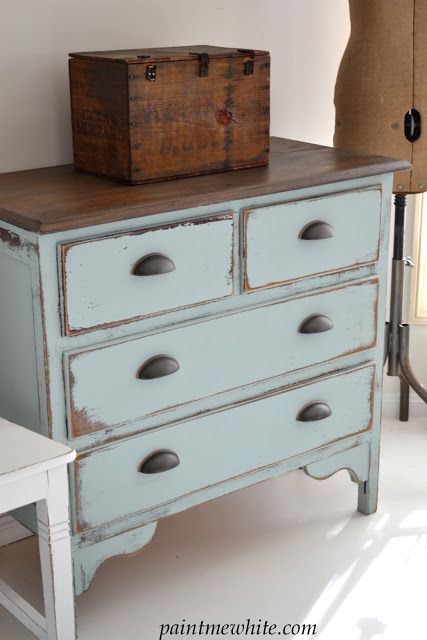
Source: paintmewhite.com
First you will need to make sure that the dresser’s surface area is clean and intact. If it is dirty, has chipping paint, or is otherwise damaged, your first job is to get it to the point where it has a clean/intact surface area. This might simply mean spraying it with a cleaner and giving it a good wipe down, or it might mean getting out a bucket of water and vinegar, and really scrubbing. Repair any damage, seal wood with shellac, and strip old paint if you need to. Do what you need to do to make the surface area workable. Then paint the surface in a color that will provide a nice background for your magazine cut-outs.
Next Up: The Creative Part
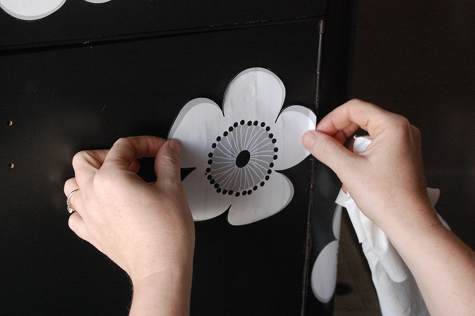
Source: designsponge.com
The next step is the fun, creative part! You will be applying magazine clippings to the dresser in a flattering arrangement. Before you actually go about sticking the clippings onto the dresser, test out a few designs. Position your magazine clippings on the surface of the dresser with a few pieces of tape, and step back to take a look at the overall effect. Play around with the design until you have it just right. Next, use your foam brush to apply a layer of Mod Podge to the back of the clipping. Stick it to the dresser. Paint a layer of Mod Podge over it.
Finish the Project
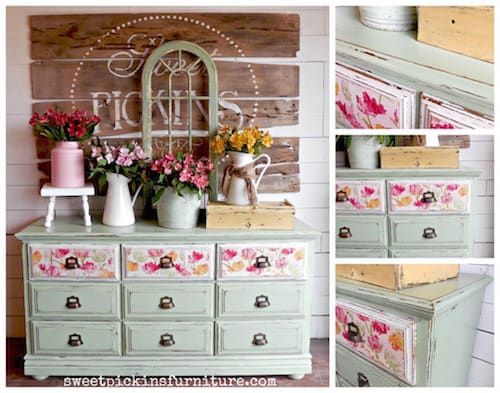
Source: modpodgerocksblog.com
Once you have all of the clippings applied in an arrangement that you like, you will need to seal your project. This is so that the paper doesn’t bubble up and separate from the wood with the passage of time. To seal the whole project, use a clear polycrylic sealer.
Apply at least two coats of this over the entire dresser. Do not simply apply it to the places where you have done decoupage. Instead, you want the coat of sealer to be evenly applyed over the entire dresser. This will ensure that the whole dresser will have a unified look.
Creative Tips

Source: thesprucecrafts.com
This technique is called decoupage. You can do decoupage with vintage fabric, tissue paper, magazine clippings, paper napkins, wrapping paper, or any other decorative paper-like object. The steps will vary slightly, depending on the texture of the fabric or paper that you are applying.
Magazine paper is thick enough not to tear as you apply the Mod Podge, and it’s also thin enough that it can easily stick to many surfaces. This makes it a great paper to play around with. An added bonus to working with magazine clippings is that you can find a wide variety of shapes, colors, and designs. Check out art magazines for intricate patters, nature magazines for beautiful landscapes, and garden magazines if you’re all about flowers.
Hope you have fun with this creative project! Once you master this DIY dresser, you might want to move on to refinishing old chairs! That is super fun, too. Is this your first time learning about decoupage? Leave a comment below, and share!
Leave a Reply